
This is another installment in an effort to continue to put out simple messages around seemingly complex topics in photography. It drives me crazy, even though I do sort of understand it, that so much is made of so little when it comes to photography. The quite simple is driven to levels of complexity that run the risk of implosion and the creation of voids or black-holes that consume anyone crazy enough to venture near. There are a ton of tedious people who thrive on debating every single nuance of every single process or piece of technology remotely associated with photography. That said, I’m sure it’s the case across just about every single area of human interest. I’m sure there’s a great debate going on right now in the knitting community, a knitting circle or message board somewhere, about the merits of needle colors and tensile strength. It seems to be human nature.
So, let me offer one qualification. This is my experience and approach. It’s straightforward. As I’ve written elsewhere I tend to simplify everywhere I can; Keep It Simple Stupid! I’ve shared my approach to film development. I did some simple explorations early on and I’ve committed to a process that works, I understand, I enjoy the results from and I focus on my art. I committed to PMK Pyro and Ilford films years ago and this was after exploring many others. This all works for me and I can realize my artistic interests and objectives through them. I obtain my chemistry from Photographers Formulary and find them of exceptional quality and extremely affordable.

This is it for me. Photographers Formulary is my preferred choice. (Left to Right) TF-4 Fixer, LFN Clearing Solution, PMK Pyro.
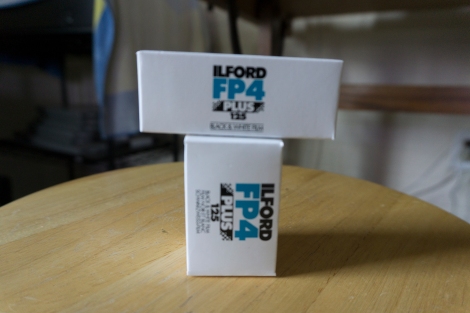
Ilford FP4. A most excellent and flexible film delivers the results that I seek. I know this film like the back of my hand because I’ve stuck with it.
So why push processing? Well, to be honest, it occurred to me that when I posted yesterday about air travel, the boxes of film I included in the photo had my scribbling on them of adjusted film speeds. Yes, I recently went a bit crazy and pushed a few rolls of FP4 and HP5 (I’ve had some left over from years gone by) because I’d decided on trying to achieve a specific effect with some photos I was taking. More importantly though, pushing film is EASY and it’s NOT HARD and it should be something that people understand and always have as an option at their fingertips for achieving an artistic outcome.
Why Push a film? Sometimes it’s circumstantial and you’re forced into it due to the environment (low or diminishing light) and the film you have. Sometimes it’s because you want to achieve a specific look and feel; more contrast or grain or whatever. You play with it and your TRIED AND TRUE development process and you see what happens and why. PMK, for the record and based upon my experience tends to not generate harsh contrast but becomes lush, deep and almost three-dimensional when used to process pushed film. I know the differences between this and normally exposed and processed film.
How to Push Film? I shoot with a Leica M6.
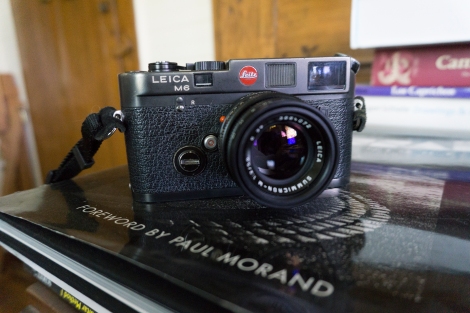
My favorite camera in the world.
I will simply make the adjustment on the back of the camera to the film speed making sure that what I end up setting supports what I’m shooting. When you push film, you’re simply treating film in a manner other than it’s base ISO. This is typically managed in terms of stops. N is the base and N+1 or N+2 means you shoot like you have film of a higher speed in your camera. So if I’m shooting with FP4, ASA 125, and I decide to push the film to ASA 250, N+1, I load the FP4 and on the back of the camera I move the ASA/ISO indicator to 250. The camera now meters as though it has 250 speed film in it; a faster film.
Key Point: You must shoot the entire roll this way, because the entire roll will be developed as one. So, note your decision and record it (hence, my notations on the film boxes in yesterday’s post). You’ll need to remember this when it comes time to develop or have your film developed.
For my most recent couple rolls, the ones I just travelled with, I pushed both the FP4 and the two remaining rolls of HP5 I had to N+2. Essentially shooting the FP4 as around ISO 500 and the HP5 as around ISO 1600. I noted this on the boxes.
When it comes time to develop, for me with PMK Pyro, it’s pretty straightforward. I double the development times. So for HP5 that means around 2o minutes and for FP4 that means around 18 minutes. This has NEVER failed me and produces absolutely predictable results. There’s a TON of information out there on development times for push/pull processing and some films come with manufacturers recommendations. Whatever! Do your homework, make your decision, try it and get it locked in. It’s not hard. Everything else in my development process stays exactly the same.
Here’s a quick sample off a roll of the HP5. I just developed the film late last night and scanned them in this morning. These are straight up scans off the negatives without any adjustments. This is a good friend of mine who asked me to take a couple photographs of her and we decided to just work with late afternoon light from a window.

HP5 pushed to N+2 (ISO 1600 Equiv) and developed with PMK Pyro for 20 minutes. While you can see the grain amplified a bit, it’s still nice and smooth.
The decision to push this film was both of necessity, our decision to just use window light late in the afternoon, as well as artistic. I really felt that this route would compliment my friend and the type of look we were after. As I noted, it’s just plain easy to do and should be something that everyone who shoots film understands they have at their fingertips to employ.
REMEMBER!! Keep it simple. Focus on your Art. Be willing to experiment. Don’t overcomplicate things and fall victim to the mania of tedious complexity.
If you’ve never tried using a Pyro developer, consider it.

Precisely …. and, well, for me it’s just the fun of it. Getting drawn into it and achieving results that are based on things I figure out. I loved that. Do you have a website?
LikeLike
I think your comments about Arista II were actually Jan. 2016, not 2013. Yes, experimeting is really fun when it comes up with something good. When it doesn’t you just have to say, “Well, that’s something I don’t have to try again,” or “What can I change to make it work?”
LikeLike
Martin, thank you so much for the comments. You know, half the fun is the experimentation part of things…that to me is essential to what I love most about photography. Experiment…who knows! Yeah, my day job is pretty all consuming…I don’t watch TV and I focus on my passions…. I wish I could put more stuff up because honestly I enjoy taking the time to focus on it and compose something.
LikeLike
Thanks so much for your comments of Jan. 13, 20123 (I believe) about using Arista II lith film. I used it yesterday, started with ISO 6 as you recommended, and worked down to ISO 1 as the film was not fresh. Best result with ISO 1, could have been better at 0, but good enough. The Dektol 1:30 worked well. I would email the excellent photo to you, but don’t have your email address. Let me know and I’ll send it. Your entire site is just great. How do you find time for your day job?!
LikeLike